Install and configure Send-only Mail Server with Exim on Ubuntu with Screenshots
Below are the Steps to Install and configure Send-only Mail Server with Exim on Ubuntu Server.
Step 1. Install postfix mail-server with the following command.
apt-get -y install exim4-daemon-light mailutils
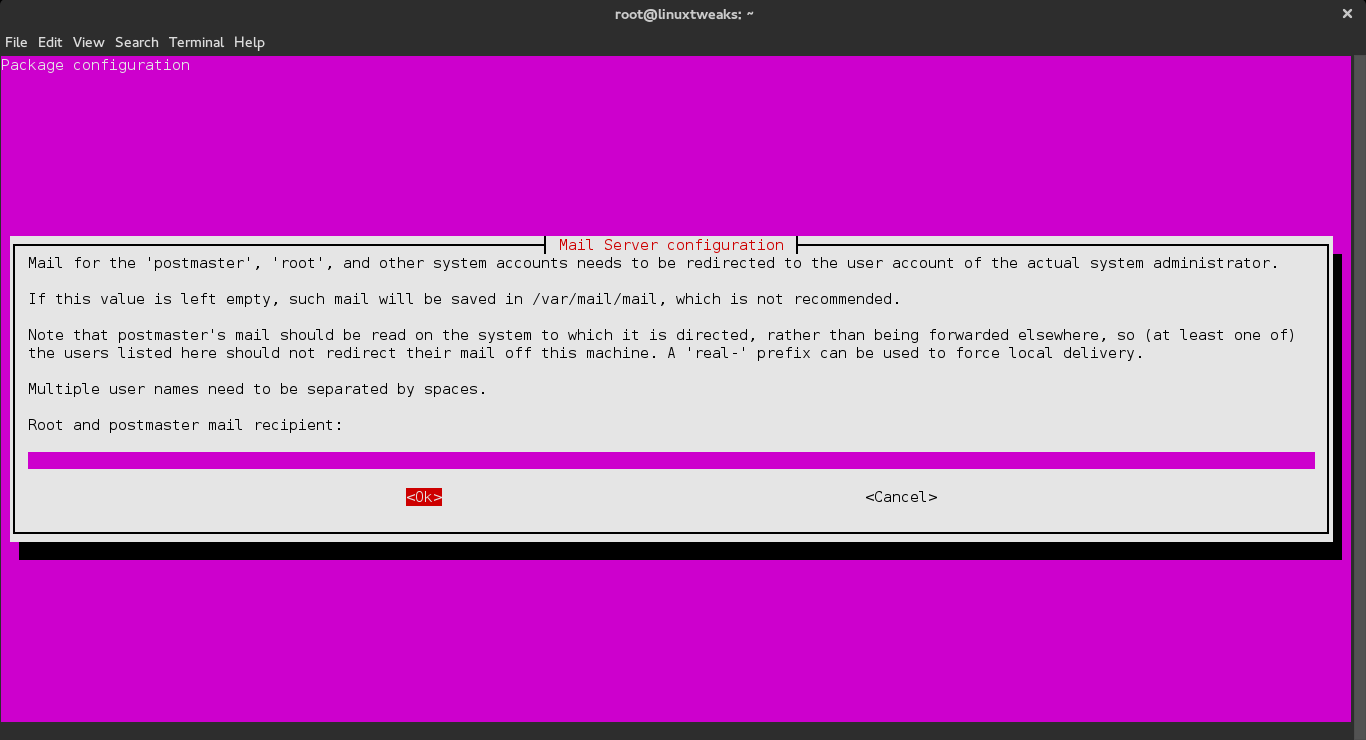
You may or may not popped up for Postfix setup wizard in this point. If it doesn’t happen manually run the following command and follow the instruction to install mail server with exim.
dpkg-reconfigure exim4-config
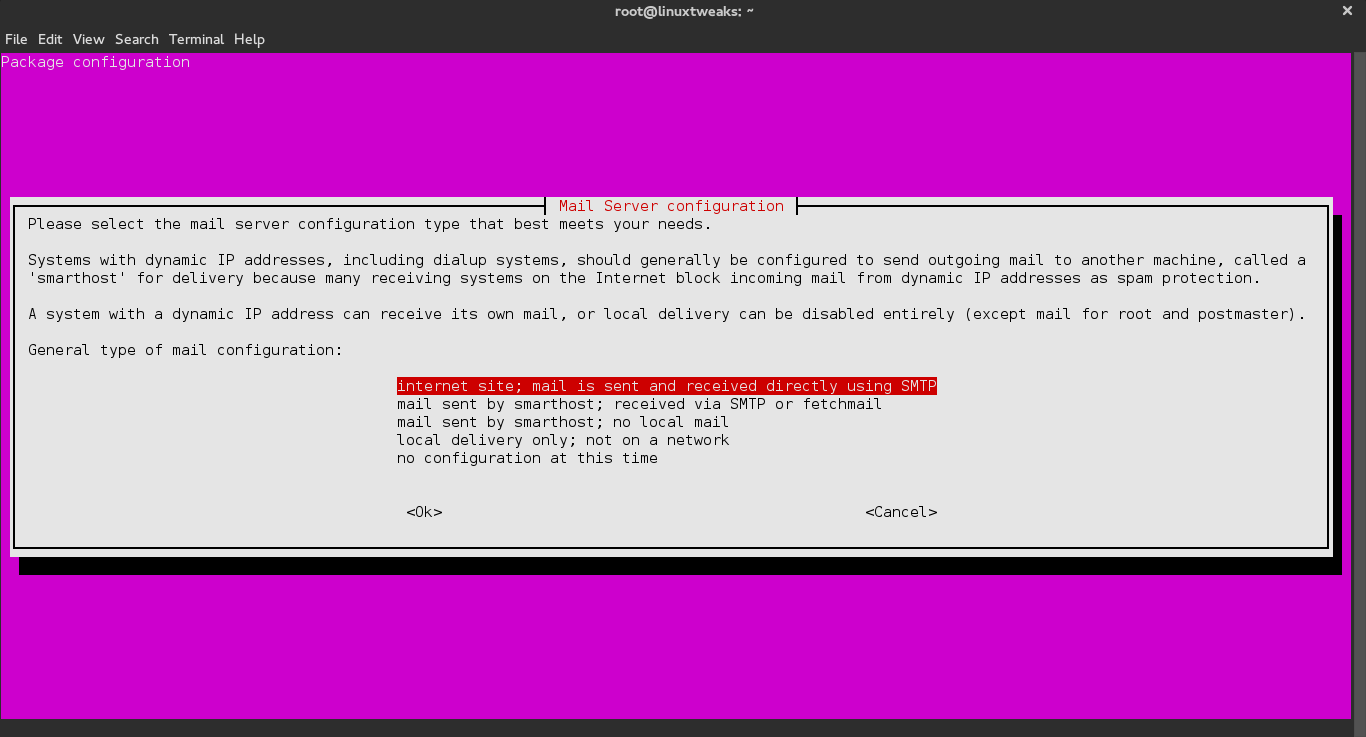
- Select the option for internet site, and then select Ok to continue.
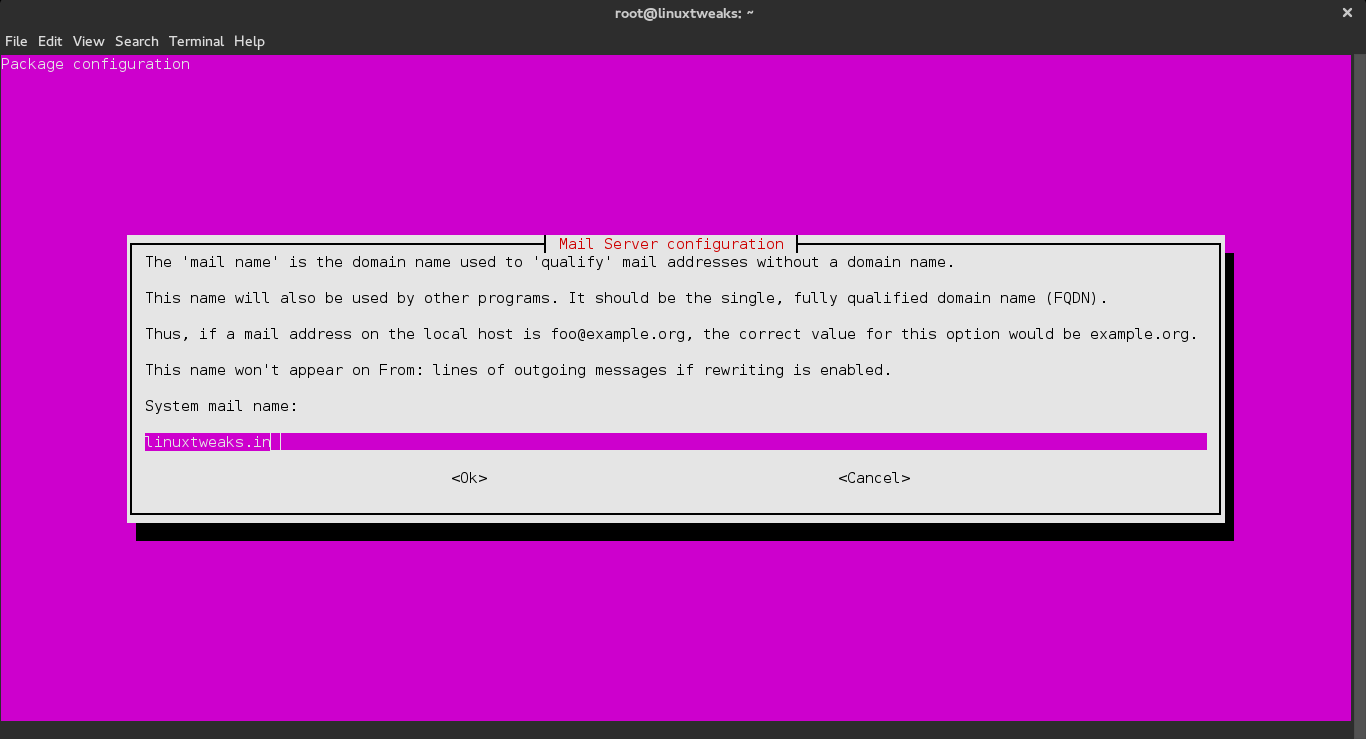
- Enter your system’s FQDN (fully qualified domain name) in the mail name configuration screen.
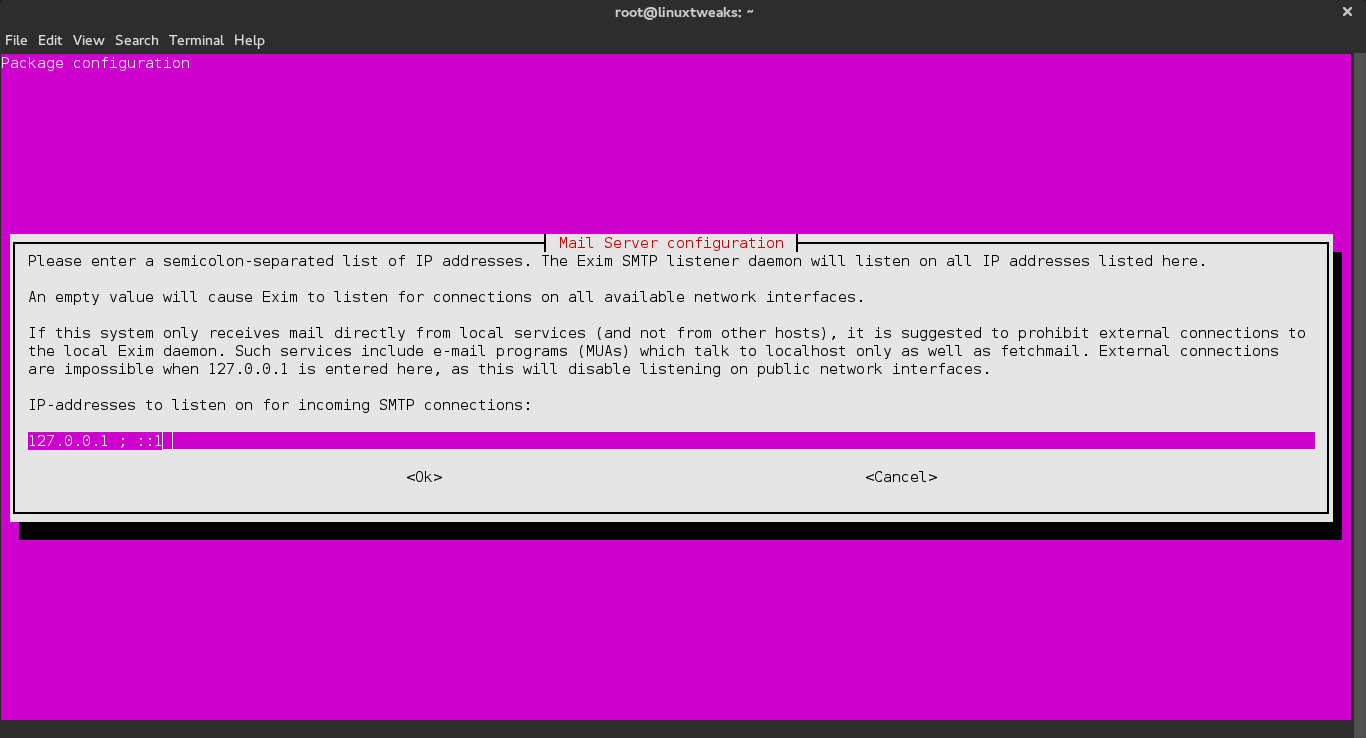
- Enter
127.0.0.1 ; ::1when asked which IP address to listen on for SMTP connections.
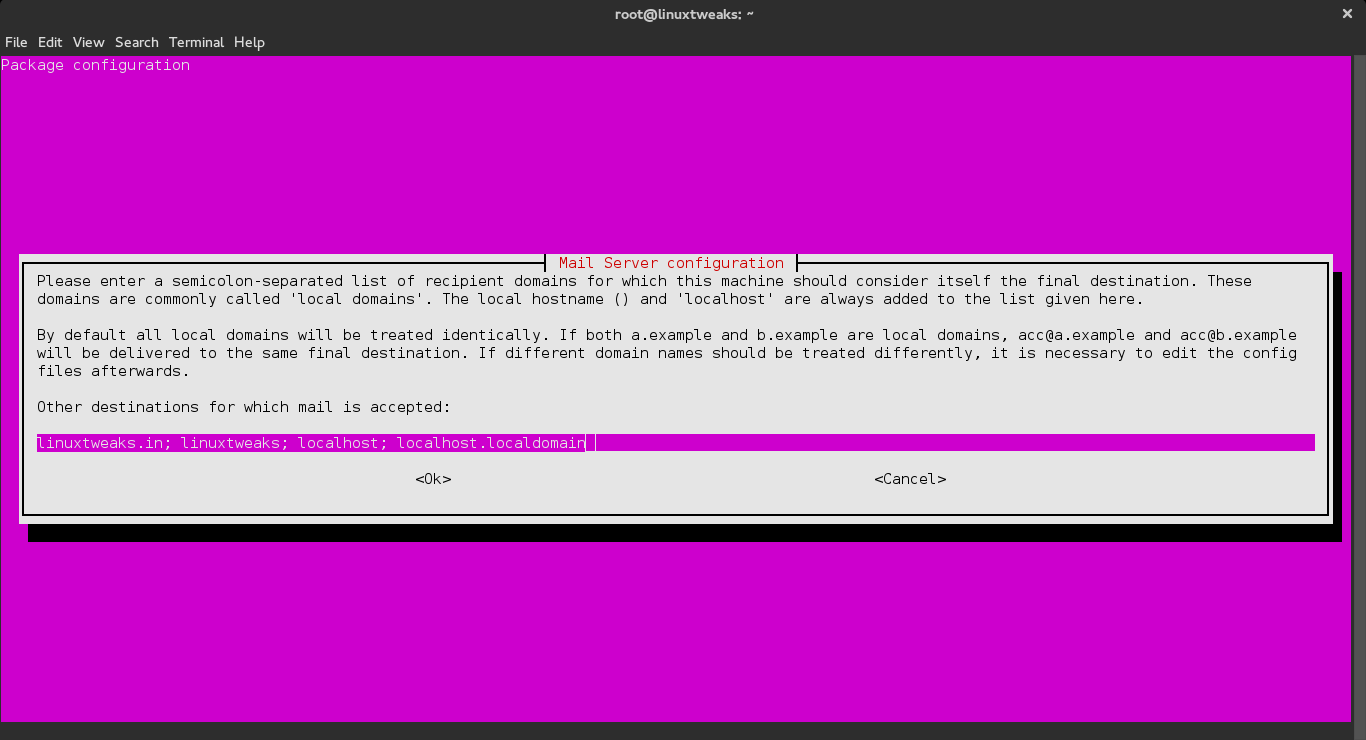
- Make sure you list your FQDN, hostname, and localhost entries when you’re asked which destinations mail should be accepted for.
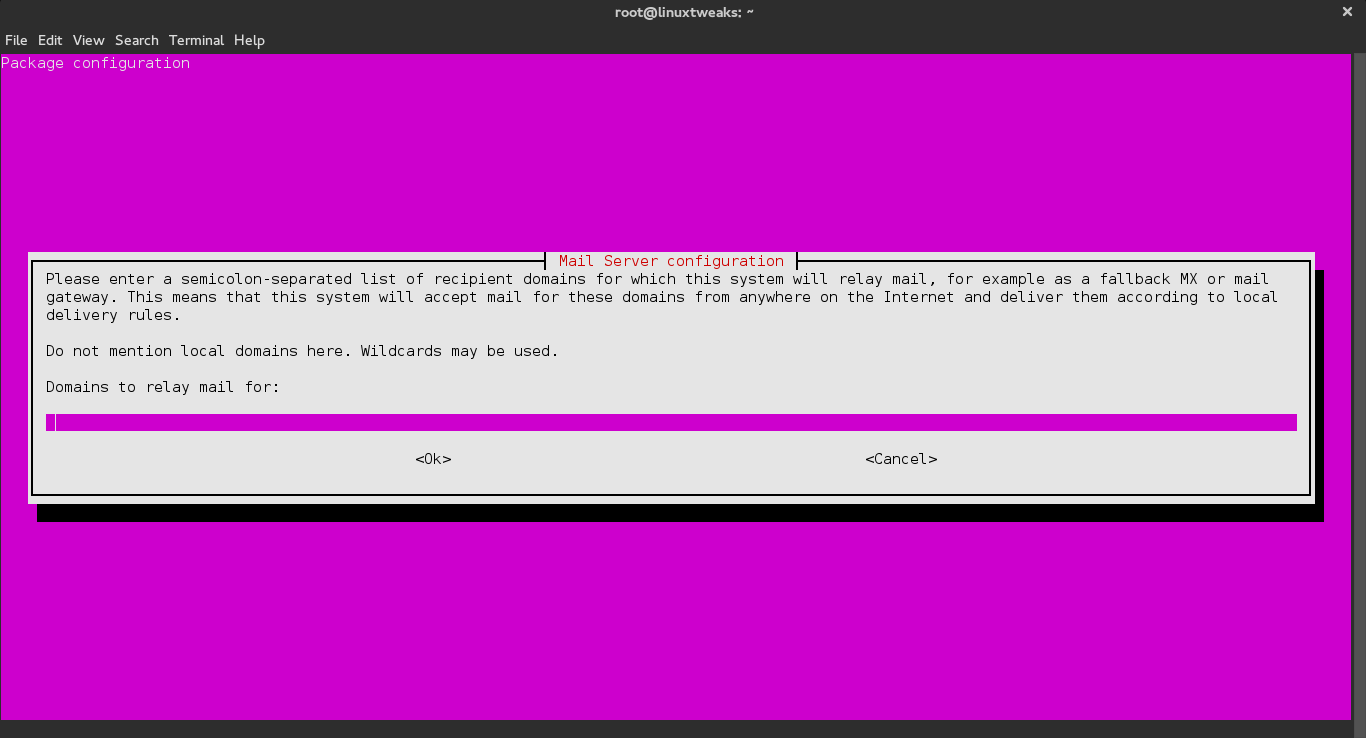
- Leave the relay domains and relay machines fields blank.
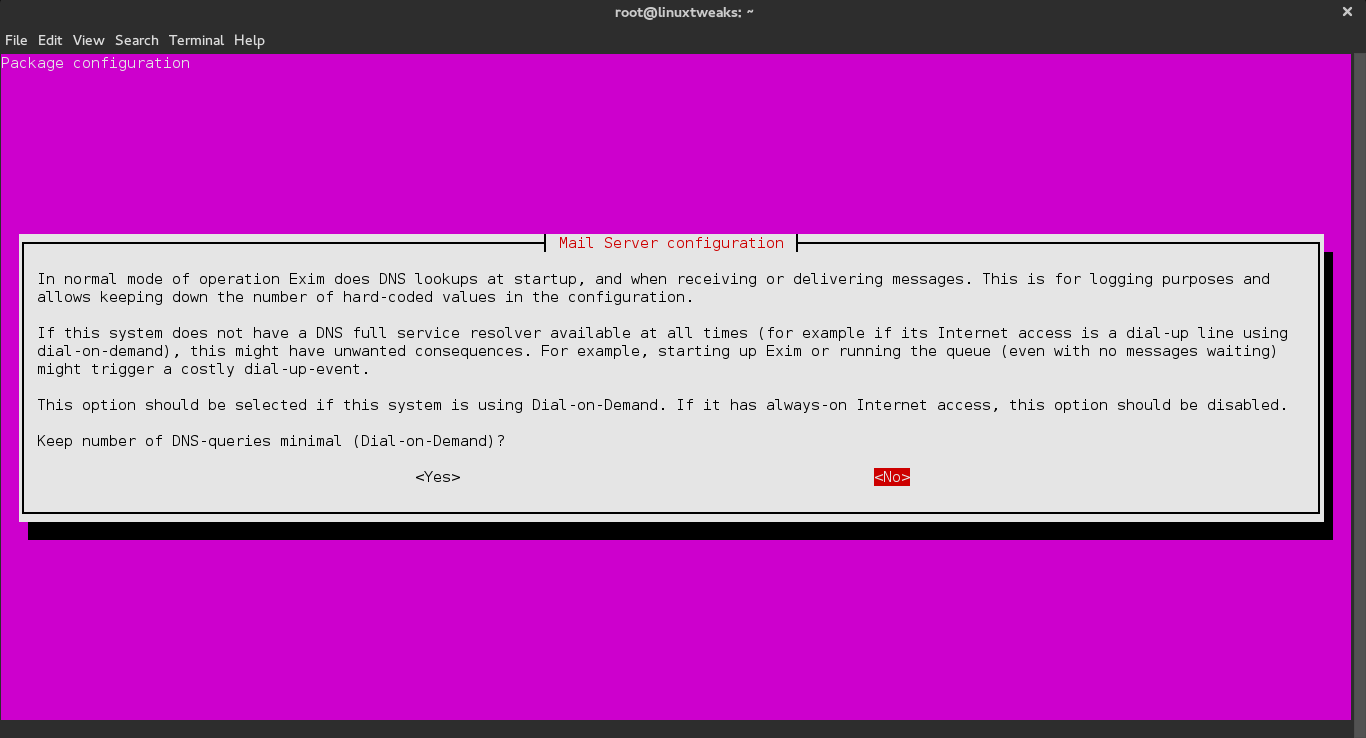
- Select No when asked whether to keep DNS queries to a minimum.
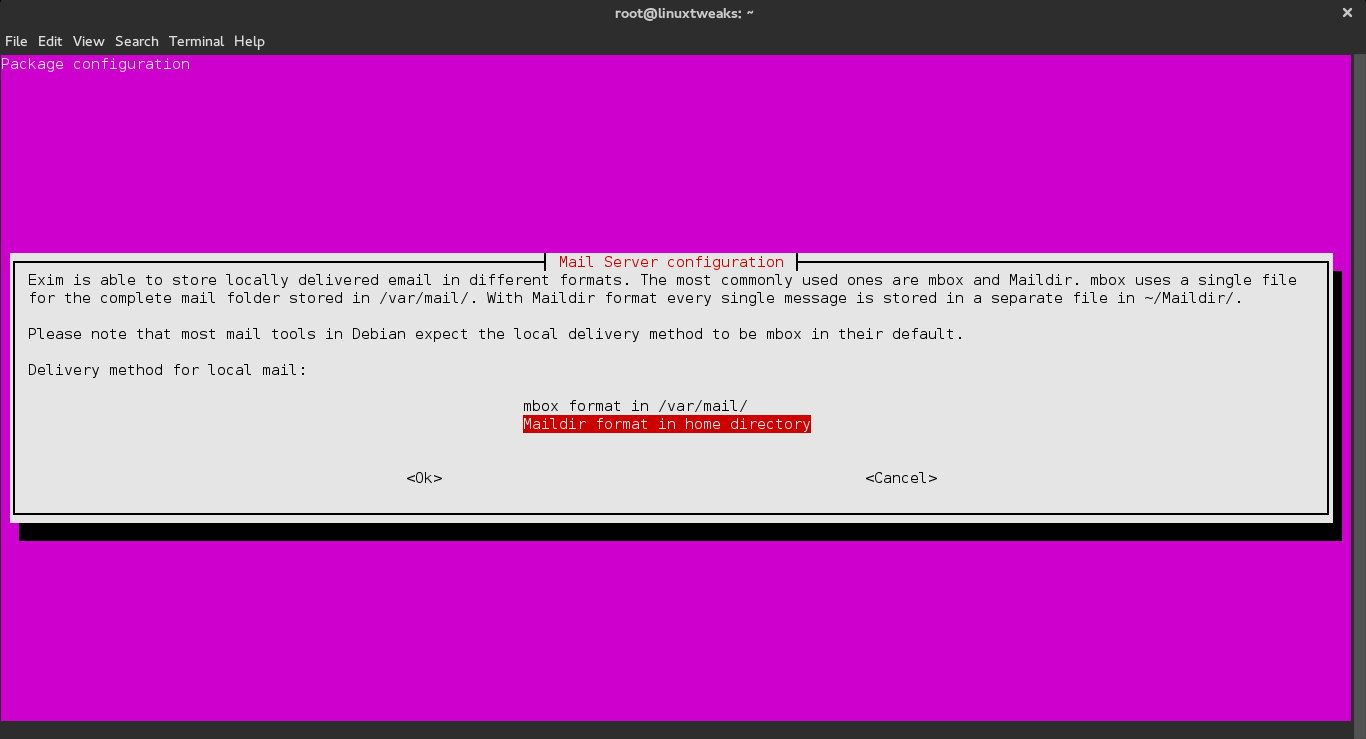
- You may select either mbox or Maildir when asked about the delivery method used for incoming mail. While many utilities use mbox format, Maildir format can make handling individual locally delivered mail messages easier, and is widely supporting by a range of applications.
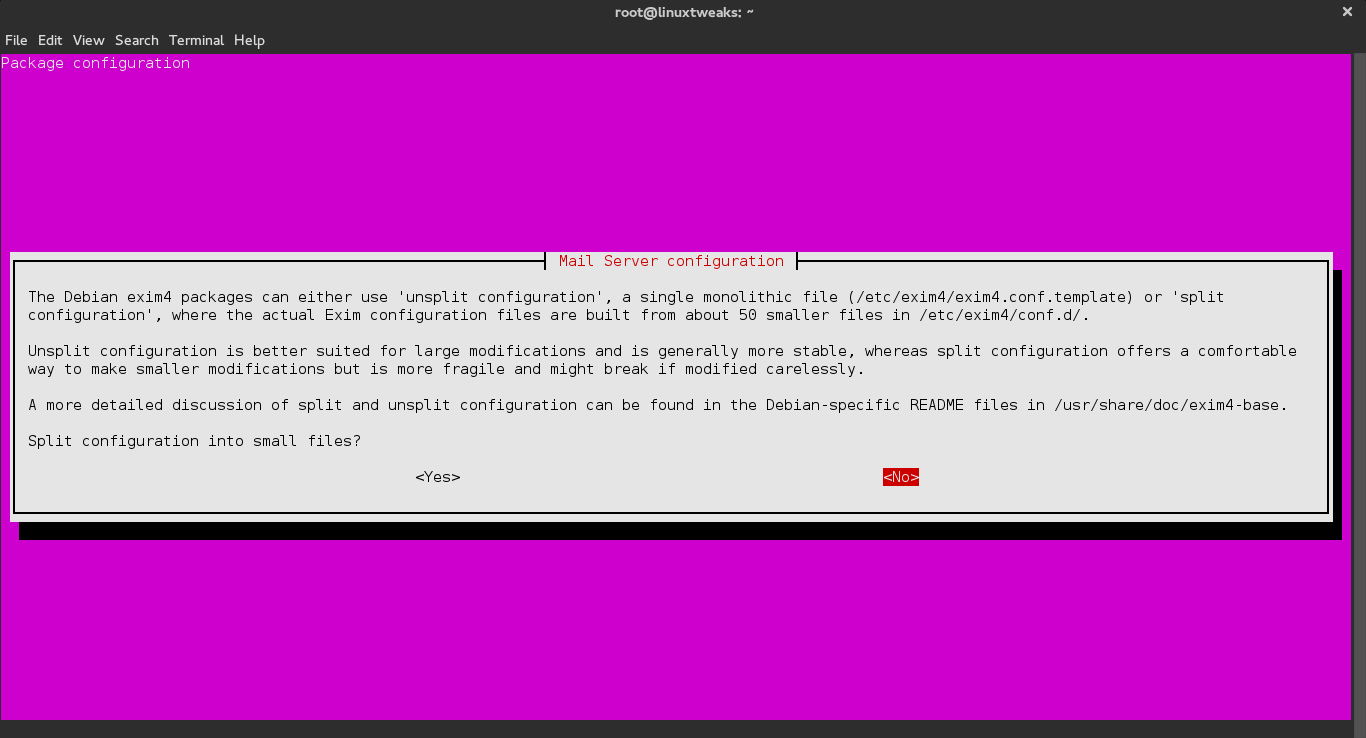
- Accept the default non-split option for your mail configuration file. Enter at least one external email address (choose one that you check frequently) in addition to root when asked to specify postmaster mail recipients.
Test Your Mail Configuration
Run the following command to send a test email to an external email address.
echo "This is a test." | mail -s Testing [email protected]
View more posts in this category !!!

